Deploying a Development Environment with the vss-cli
This tutorial details how to deploy a development environment in the ITS Private Cloud using the VSS CLI. It assumes you already have set up a VSS account with access to the REST API.
Launch Instance
Before launching the virtual machine instance we need the following items:
Operating system
Network
Folder
ISO image
Then, all is ready to deploy a brand new virtual machine.
Operating system
Run vss-cli compute os ls to display the list of supported operating systems in
the ITS Private Cloud. In order to narrow down the list to only CentOS operating
systems, use the --filter-by/-f option which is structured
<field_name>=<operator>,<value> and available operators are
eq, ne, lt, le, gt, ge, like, in. So, to limit results to just CentOS, use
the following filter:
Note
This version of the VSS CLI supports providing OS reference
not only using the guest_id, but also the full_name or Id.
In case of multiple results, the CLI prompts to select the right instance.
vss-cli compute os ls --filter-by full_name=CentOS

  id  guest_id         full_name            family
----  ---------------  -------------------  ----------
  24  centos64Guest    CentOS 4/5 (64-bit)  linuxGuest
  70  centos6_64Guest  CentOS 6 (64-bit)    linuxGuest
  26  centos6Guest     CentOS 6             linuxGuest
  15  centos7_64Guest  CentOS 7 (64-bit)    linuxGuest
  78  centos7Guest     CentOS 7             linuxGuest
  95  centos8_64Guest  CentOS 8 (64-bit)    linuxGuest
   2  centosGuest      CentOS 4/5           linuxGuest
Set the OS environment variable to centos64Guest to save the guest_id:
export OS=centos64Guest
Network
Run vss-cli compute net ls to list available network segments to your account. You must
have at least VL-1584-VSS-PUBLIC which is our public network.
Note
This version of the VSS CLI supports managing networks
not only using the moref, but also using names. In case of multiple results,
the CLI prompts to select the right instance.
vss-cli compute net ls -f name=public
moref              name                description         subnet            ports
-----------------  ------------------  ------------------  --------------  -------
dvportgroup-11052  VL-1584-VSS-PUBLIC  VSS Public network  142.1.216.0/23       32
Save dvportgroup-11052 in NET environment variable:
export NET=dvportgroup-11052
By default, the network adapter will use vmxnet3 which provides ideal performance, however a few legacy operating systems does not have the drivers. In such case, you can specify which adapter type between: e1000e*, e1000, vmxnet2 or vmxnet3. To do so, append the adapter type to the network adapter network as follows:
export NET=dvportgroup-11052=e1000e
Folder
Logical folders can be listed by running vss-cli compute folder ls. Select the target
moref folder to store the virtual machine on:
Note
This version of the VSS CLI supports managing logical folders
not only using the moref, but also using names. In case of multiple results,
the CLI prompts to select the right instance.
vss-cli compute folder ls -f name=API

moref        name     parent    path
-----------  -------  --------  ----------------------------
group-v6736  APIDemo  jm        jm > APIDemo
Set the FOLDER environment variable to the target folder (the folder moref may vary):
export FOLDER=group-v6736
ISO Image
Since this tutorial creates a virtual machine from scratch, an ISO image is required to
install the operating system. Run vss-cli compute iso public ls to display available
ISO images in both the VSS central store and your personal VSKEY-STOR space.
Note
This version of the VSS CLI supports managing ISOs
not only using the path, but also using name or ID or path. In case of multiple results,
the CLI prompts to select the right instance.
vss-cli compute iso public ls -f name=Cent%
path                                                           name
-------------------------------------------------------------  -------------------------------------
[vss-ISOs] Linux/CentOS/CentOS-7.0-1406-x86_64-DVD.iso         CentOS-7.0-1406-x86_64-DVD.iso
[vss-ISOs] Linux/CentOS/CentOS-7.0-1406-x86_64-NetInstall.iso  CentOS-7.0-1406-x86_64-NetInstall.iso
[vss-ISOs] Linux/CentOS/CentOS-7.0-1406-x86_64-Minimal.iso     CentOS-7.0-1406-x86_64-Minimal.iso
Save the desired path to ISO environment variable:
export ISO='[vss-ISOs] Linux/CentOS/CentOS-7.0-1406-x86_64-DVD.iso'
Deployment
Run vss-cli compute vm mk shell to deploy a virtual machine without an operating system
installed. Before deploying the virtual machine, display what options and arguments the shell
command takes:
Usage: vss-cli compute vm mk shell [OPTIONS] NAME

  Create a new VM with no operating system pre-installed.

Options:
  -d, --description TEXT          A brief description.  [required]
  -b, --client TEXT               Client department.  [required]
  -a, --admin TEXT                Admin name, phone number and email separated
                                  by `:` i.e. "John
                                  Doe:416-123-1234:john.doe@utoronto.ca"
  -r, --inform TEXT               Informational contact emails in comma
                                  separated
  -u, --usage [Test|Prod|Dev|QA]  Vm usage.
  -o, --os TEXT                   Guest operating system id.  [required]
  -m, --memory INTEGER            Memory in GB.
  -c, --cpu INTEGER               Cpu count.
  --cores-per-socket INTEGER      Cores per socket.
  -f, --folder TEXT               Logical folder moref name or path.
                                  [required]
  --scsi TEXT                     SCSI Controller Spec <type>=<sharing>.
  -i, --disk TEXT                 Disk spec
                                  <capacity>=<backing_mode>=<backing_sharing>.
                                  optional: backing_mode, backing_sharing
                                  [required]
  -n, --net TEXT                  Network adapter <moref-or-name>=<nic-type>.
                                  [required]
  -t, --domain TEXT               Target fault domain name or moref.
  --notes TEXT                    Custom notes.
  -s, --iso TEXT                  ISO image to be mounted after creation
  -e, --extra-config TEXT         Extra configuration key=value format.
  --power-on                      Power on after successful deployment.
  --template                      Mark the VM as template after deployment.
  --vss-service TEXT              VSS Service related to VM
  --instances INTEGER             Number of instances to deploy  [default: 1]
  -w, --firmware TEXT             Firmware type.
  --storage-type TEXT             Storage type.
  --tpm                           Add Trusted Platform Module device.
  --retire-type [timedelta|datetime]
                                  Retirement request type.
  --retire-warning INTEGER        Days before retirement date to notify
  --retire-value TEXT             Value for given retirement type. i.e.
                                  <hours>,<days>,<months>
  --help                          Show this message and exit.
Now that we have everything, proceed to deploy a new virtual machine with 1GB of memory,
1 vCPU, 20GB disk and 100GB disk (independent_persistent: not affected by snapshots)
and a tag Project:CMS as follows:
vss-cli  --wait compute vm mk shell --description 'Application server' --client EIS \
--os centos8 --memory 1 --cpu 1 --folder APIDemo \
--disk 20 --disk 100=independent_persistent \
--net PUBLIC --iso centos \
--storage-type ssd \
--notes 'Project: CMS' --power-on \
AppServer3
Note
Deploy multiple instances with the --instances flag.
A confirmation email will be sent and the command will return the request id and
task_id as follows:
id                  : 78
status              : IN_PROGRESS
task_id             : af6e1d45-6890-4329-b2c2-c3e3d6d28cfd
message             : Request has been accepted for processing
⏳ Waiting for request 78 to complete...
🎉 Request 78 completed successfully:
warnings            : Fault Domain: Cluster1 (domain-c63), Created in: VSS > Development > Dev03 (group-v907),
                      Network adapter 1 (vmxnet3): 00:50:56:b0:0e:30: Quarantine,
                      Successfully powered on.
errors              :
In matter of seconds, a confirmation email will be sent with the allocated IP address, if
VL-1584-VSS-PUBLIC was selected.
Manage Request
If you prefer to validate the status of the request with VSS CLI, run vss-cli request new ls to
display a list of your request history.
This command supports filter and sorting by using the --filter-by/-f and --sort/-s
respectively. Filter list in the following format <field_name>=<operator>,<value>
where operator is eq, ne, lt, le, gt, ge, like, in. For example: status,eq,Processed.
Sort list in the following format <field_name> <asc|desc>.
In order to obtain the last request submitted, status and resulting virtual machine uuid, run
the following command:
vss-cli request new ls -s created_on=desc -c 1

  id  created_on                   updated_on                   status     vm_moref    vm_name          approval.approved    built_from
----  ---------------------------  ---------------------------  ---------  ----------  ---------------  -------------------  ------------
  78  2020-04-24 Fri 17:06:49 EDT  2020-04-24 Fri 17:06:51 EDT  PROCESSED  vm-2185     2004T-Frontend3  True                 os_install
Access Instance
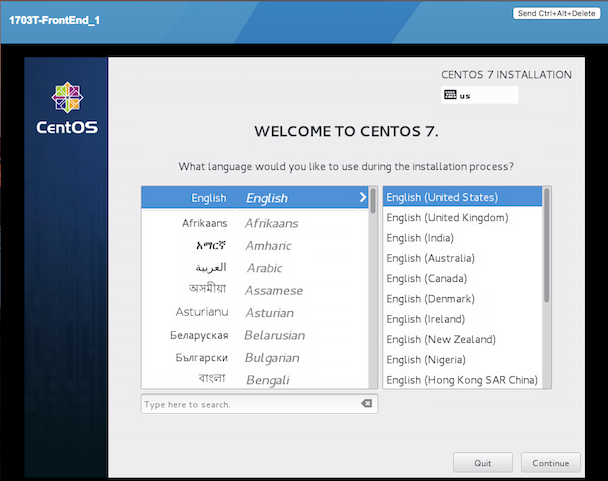
Since we added the --power-on option, the virtual machine should have been powered on
right after the Guest Operating System Customization task completed.
In a few minutes the virtual machine will show the hostname and ip configuration by running
vss-cli compute vm get <name-or-vm-id> guest:
vss-cli compute vm get docker-node1 guest

hostname            : fe2
ip_address          : 142.1.217.228, fe80::250:56ff:fe92:323f
full_name           : CentOS 8 (64-bit)
guest_id            : centos8_64Guest
running_status      : guestToolsRunning
The Guest Host Name shows that the hostname has been changed, and now
you will be able to access via either ssh or the virtual machine console:
ssh username@<ip-address>
vss-cli compute vm get Frontend2 vsphere-link -l